
Code examples
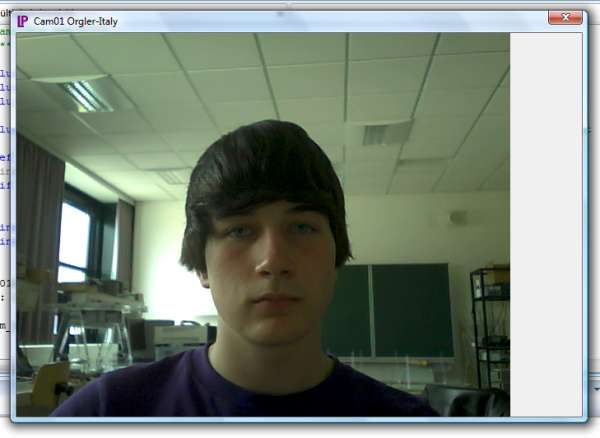
1 the simplest webcam program
download WebCAM01 source exe
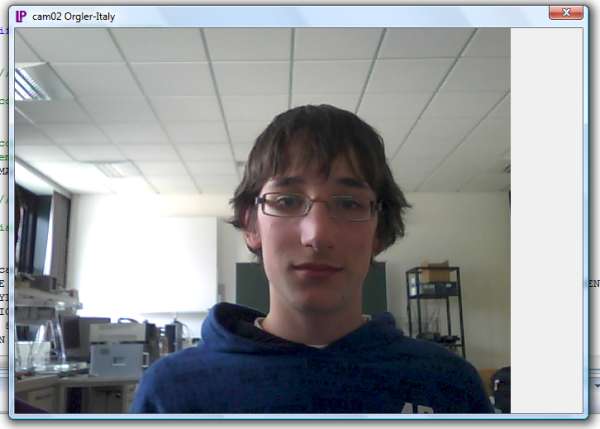
2 use a timer to grab image
download cam02 source exe
3 save image to memory
download cam03 source exe
4 image mirror; save image as jpg to disc
download cam04 source exe
5 rotate image
download cam05 source exe
6 toggle from color to grayscale
download cam06 source exe
7 motion detection part 1
download cam07 source exe
8 motion detection part 2
download cam08 source exe
9 motion detection part 3
download cam09 source exe
10 motion detection part 4
download cam10 exe
11 save an image xx1.jpg if motion detected
download cam11 source exe
12 take images from another webcam program
download cam12 source exe
if you are successful send an email,
if one program can be useful for you write,
any problem or suggestion? orgler (at) tin . it
download WebCAM01 source exe
2 use a timer to grab image
download cam02 source exe
3 save image to memory
download cam03 source exe
4 image mirror; save image as jpg to disc
download cam04 source exe
5 rotate image
download cam05 source exe
6 toggle from color to grayscale
download cam06 source exe
7 motion detection part 1
download cam07 source exe
8 motion detection part 2
download cam08 source exe
9 motion detection part 3
download cam09 source exe
10 motion detection part 4
download cam10 exe
11 save an image xx1.jpg if motion detected
download cam11 source exe
12 take images from another webcam program
download cam12 source exe
if you are successful send an email,
if one program can be useful for you write,
any problem or suggestion? orgler (at) tin . it
Create Your own MFC Dialog Project
Insert a few lines in the OnInitDialog
or download the source code
to read an image from the webcam initialize a window handle with capCreateCaptureWindow
and connect this handle with the installed webcam driver.
The first image is now in your window
#include//!!!! insert vfw32.lib in project cam_properties configuration Linker-Input #define ImageX 600 #define ImageY 480 HWND hMyWindow; BOOL CCam01Dlg::OnInitDialog() { CDialog::OnInitDialog(); SetIcon(m_hIcon, TRUE); SetIcon(m_hIcon, FALSE); // TODO: hMyWindow = capCreateCaptureWindow("handle", WS_CHILD | WS_VISIBLE, 0, 0, ImageX, ImageY, this->m_hWnd, 1); // connect the driver with the webcam bool xx = capDriverConnect(hMyWindow,0); if(xx == false) { AfxMessageBox("Webcam not found ",0,0); return false; } return TRUE; }
BOOL Ccam02Dlg::OnInitDialog()
{
CDialog::OnInitDialog();

SetIcon(m_hIcon, TRUE);
SetIcon(m_hIcon, FALSE);
// TODO:

hMyWindow = capCreateCaptureWindow("handle", WS_CHILD | WS_VISIBLE,
0, 0, ImageX, ImageY, this->m_hWnd, 1);

// connect the driver with the webcam
bool xx = capDriverConnect(hMyWindow,0);
        if(xx == false)
        {
        AfxMessageBox("Webcam not found ",0,0);
        return false;
        }
   //----------- Set the Timer to grab new images -----------
        SetTimer(1,40,0);

        return TRUE;
}


void Ccam02Dlg::OnTimer(UINT_PTR nIDEvent)
{
    if(nIDEvent == 1)
        {
    capGrabFrame(hMyWindow);
        }
        CDialog::OnTimer(nIDEvent);
}
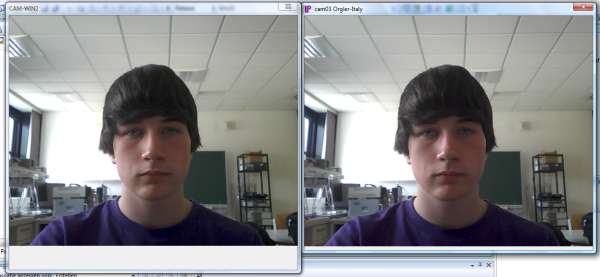
CWin2Dlg  dlgWin2;   // like a pointer to CWin2Dlg class

  //==== create and shows the second dialog window =========
        dlgWin2.Create(IDD_WIN2,this);
        dlgWin2.ShowWindow(SW_SHOW);


void Ccam03Dlg::OnTimer(UINT_PTR nIDEvent)
{
    if(nIDEvent == 1)
        {
    capGrabFrame(hMyWindow);

    if(iBitmapFlag==0)  // create a Bitmap only once
    {
    capture_map.CreateCompatibleBitmap( dc , ImageX, ImageY );
    iBitmapFlag=1;
    }

    capture_dc.CreateCompatibleDC( dc );
    capture_dc.SelectObject( &capture_map );
    capture_dc.BitBlt( 0, 0, ImageX, ImageY, dc, 0, 0, SRCCOPY );  //copy image to bitmap

    //======= copy the image from bitmap to memory (arrImage1)===============
    LPBYTE lpBits = arrImage1;   // pointer
    int xx,err;
    xx = GetDIBits(capture_dc, capture_map, 0, ImageY, lpBits, &bmpinfo, DIB_RGB_COLORS);
    if(xx == 0)   err = GetLastError(); // only for debug

  //*********** copy data from arrImage1 to arrImage2 *********************
        int ii=0;
        int iimax = sizeof(arrImage1);
    while( ii < iimax)
        {
                arrImage2[ii] = arrImage1[ii];
         ii++;
        }
        dlgWin2.InvalidateRect(RectWin2,false); // repaint WIN2  with arrImage2

        }
        CDialog::OnTimer(nIDEvent);
}
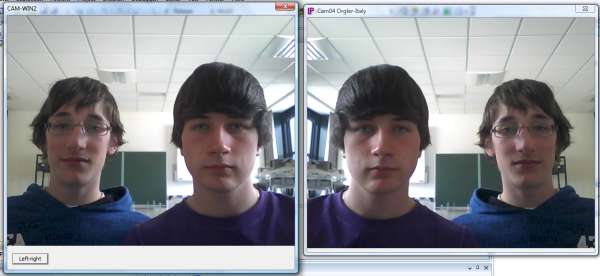
//*********** copy data from arrImage1 to arrImage2 *********************
        int iLine,iCol,index1,index2;
        int ii=0;
        int iimax = sizeof(arrImage1);

        if(iFlagLeftRight == 0)
        {
                while( ii < iimax)
                {
                arrImage2[ii] = arrImage1[ii];
        ii++;
                }
        }
        if(iFlagLeftRight == 1)
        {
     iLine=0;
         while(iLine < ImageY)
         {
      iCol=0;
                index1 = iLine * ImageX * 4;
                index2 = index1 + ImageX * 4 - 4;

          while(iCol < ImageX)
          {
                arrImage2[index2]   = arrImage1[index1++];
                arrImage2[index2+1] = arrImage1[index1++];
                arrImage2[index2+2] = arrImage1[index1++];
                arrImage2[index2+3] = arrImage1[index1++];
        index2 -= 4;
                iCol++;
          }
          iLine++;
         }

        }
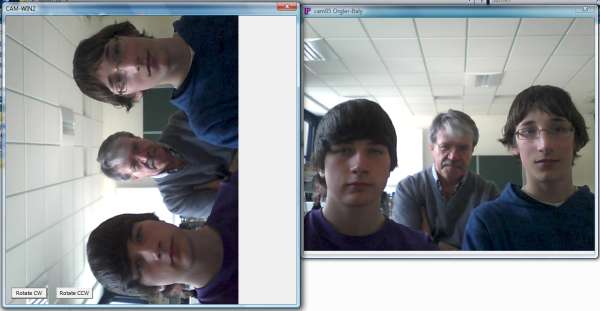
To rotate the image we copy the data from arrImage1 to arrImage2
changing lines and colummns in the right manner.

 0 degree: no rotation, lines   starts from zero to linemax
                         columms starts from zero to columnmax

 90 degree: columms starts from columnmax to zero
            lines   starts from zero to linemax

180 degree: lines   starts from linemax to zero
            columms starts from columnmax to zero

270 degree: columms starts from zero to columnmax
            lines   starts from linemax to zero
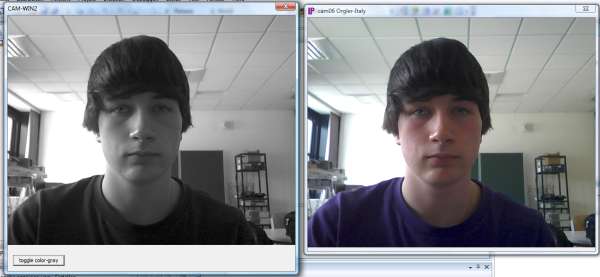
every pixel of image is composed with four bytes
first byte blue, second green, third red, fourth byte is not used
For the gray value we take 11% blue, 59% green and 30% red

      grayblue  = arrImage1[index1];     // add 11%
      grayblue *= 28;
      graygreen = arrImage1[index1+1];   // add 59%
      graygreen *= 151;
      grayred   = arrImage1[index1+2];   // add 30%
      grayred  *= 77;
      grayall = grayblue + graygreen + grayred;
      grayall /= 256;

!! multiply with 28 and to divide with 256 ist the same
   as multiply with 11 and to divide with 100
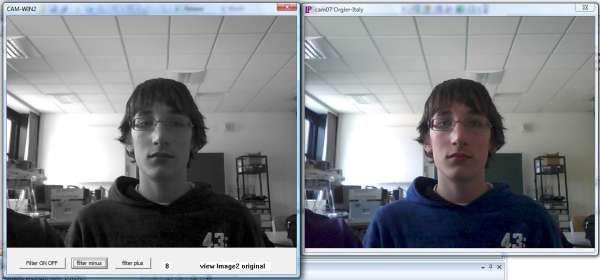
To detect motions in an image we need a reference image.
The original or new image subtracted from the reference image is the motion value.
This operation is made with every pixel inside a defined rectangle and the sum of
all pixels gives us the motion value.
The difference is always absolute.


The reference image is a low pass filtered image.
The value of every pixel is calculated as follow:

PixelFilteredNew = PixelFilteredOld - PixelFilteredOld/8 + PixelNewValue/8;

The value 8 is the filter level.
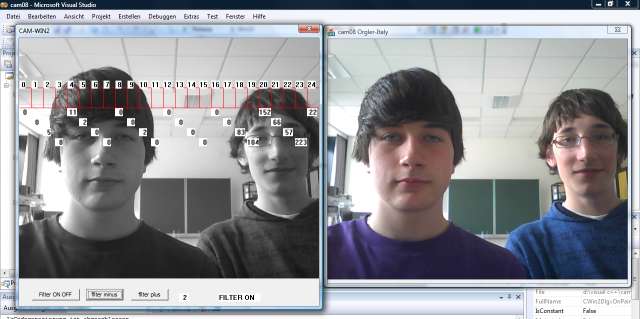
inside a given rectangle we made the difference (absolute mode)

 of every

pixel from the reference image and the new image.
inside a given rectangle we made the difference (absolute mode)
of every
pixel from the reference image and the new image.

A blue rectangle is illuminated if the motion value rises a given level.
The motion can be detected with different color pixels.
if the variation of motion exceeds the threshold an image with progressive number

will be saved

to the actual directory: xx1.jpg, xx2.jpg ..... xxnn.jpg

this program can be used like a webcam-alarm-system
you can use another webcam-program and take images in your program to

elaborate or modify the image.

You can make motion detect, edge detect and more  . . .

Move the mouse over the other program-window and push the digit key '1'

The handle from window on this mouse position will be copied in a variable,

the content of this window will be copied in the arrImage1 and painted in our window.

You can make elaboration directly in the arrImage1 or copy to another array and make

there the elaboration.